


Last School year we had a good behavior chart and when we
had the kiddos choose a few rewards to earn. One of the rewards the daycare
kiddos was to make their own stuffed animal. The inspiration we received for
this craft was this photo from Martha Stewart. At the end of the school
year, before we shut down for the summer, we told them that when they came back
they could make their very own stuffed animal.
The original plan was to use some remnant fabric that Mom
had scattered about the farm house. However, when she emptied part of the attic
to reduce the amount of clutter up there, she found a bunch of felt. Since felt
doesn't need to be hemmed we decided to use it instead of fabric with the kids.
On Tuesday I sat them down and explained the plan. They set
to work and by Tuesday afternoon we were cutting out pieces and pining them
together. Wednesday after our walk they attached details. One of the kiddos
completely finished his project and another had to wait for glue to dry. Today
most of them are stuffed and ready to go home. I am really impressed and proud
of them. They have worked hard, carefully, and inventively. They have stuck
worked on it for days and even when their attention waned. I think we will be
seeing more projects like this in our future.
Our creations:
Pokemon Ball with Haunter
Pokemon Ball with Pikachu
Ice Cream Cone
Octopus
Butterfly
The only limit is your imagination!
Materials:
Felt of different colors
Needle
Floss of different colors
Bits and Bobs: buttons, beads, bells, rick-rack, ribbon,
pipe cleaners, lace, ribbon, ect
Liquid Stitch


Step 1:
Draw or sketch out your idea. The only limit is your
imagination. One kiddo wanted to make a cube, than a ball, but we asked him to
alter his plan to a pillow shape which he was able to make.
Step 2:
Create pattern pieces. We had them finalize the sketch to
the proper size and then using the printer/scanner I photo copied it so that we
would have two exact pieces.
Step 3:
Cut and pin. Cut out all your pattern pieces and attach them
to felt or fabric.
Step 4:
Cut out pieces and pin together. Remember that if you are
using felt you do not have to put wrong sides together. You can stitch it and
see the stitches and it will look great. For arms and legs or other appendages
we stitched them to the inside before putting our main pieces together. Start
with your details first so that your knots are all easily concealed on the
inside.
Step 5:
Attach details: arms, legs, extra bits to make it special,
to the main body.
Step 6:
Attach back and front of main body to complete stuffie.
Leave a hole to push stuffing into.
Step 7:
Stuff
Step 8:
Sew up any remaining holes and you’re done.
We are doing this project with a kindergartner. She needs a
lot of help, but is able to do a lot of the stitching herself.
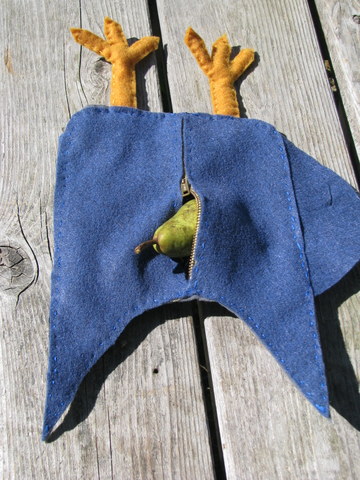
I did this project for Stomper but added some "skill trainers" in the form of two buttons for him to practice with and a zipper on the back so he could use it as a secret pocket for hiding special things in. I considered adding some shoelaces to practice tying, but he's still a little small for tying.


I did this project for Stomper but added some "skill trainers" in the form of two buttons for him to practice with and a zipper on the back so he could use it as a secret pocket for hiding special things in. I considered adding some shoelaces to practice tying, but he's still a little small for tying.


